A little late...ok a week and a day late posting but we had a lovely afternoon last Sunday at our Christmas Card Create Class. We had 4 lovely ladies attend and spent a few hours having a lot of fun creating three cards, whilst enjoying some delicious home made scones (mum made not me!)
For the first two cards of the afternoon,

we used the Quilted Christmas Suite:
- Christmas Quilt photopolymer bundle which consists of the Christmas Quilt Photopolymer Stamp Set and Quilt Builder Framelits Dies but saves you 10% of the cost!
- Stitched Felt Embellishments (5 each of 3 shapes - a tree, star, and holly - we only used the trees and stars for these cards)
- Quilted Christmas 6"x6" Designer Series Paper
- Quilted Christmas A4 Cardstock (a pack of 24 sheets, 8 sheets each of Real Red A4 Cardstock, Lemon Lime Twist A4 Cardstock, Garden Green A4 Cardstock)
- Inks used: Garden Green, Real Red, Lemon Lime Zest, and Powder Pink

Here is my card:
We cut a sheet of Garden Green A4 Cardstock in half then folded in half to create an A6 card blank. We used the triangle and stitched triangle dies from Quilt Builder Framelits Dies to cut out three triangles from a sheet of Quilted Christmas 6"x6" Designer Series Paper. Using the Christmas Quilt Photopolymer Stamp Set we stamped two triangles (in co-ordinating colours) and added the stitched triangle around them in a contrasting colour, then again used the die to cut them out. Lining these up across the card so they overlapped slightly, we stuck three straight to the Whisper White Card strip, raised two up on Stampin' Dimensionals, and then added one of the tree Stitched Felt Embellishments.

To stamp the greeting "Christmas" we used the "Have yourself a merry little Christmas" stamp...but to only ink up the word Christmas we used the Real Red marker from the Old Olive & Real Red Stampin' Write Markers pack! This was stamped onto a strip of Powder Pink A4 Cardstock trimmed to a banner using Paper Snips and again adhered with Stampin' Dimensionals. Stitching was added underneath the image using the xxx stamp in Garden Green.
The second card was a quick and easy card, and again was cased from the catalogue but ended up a cross between the two cards shown:

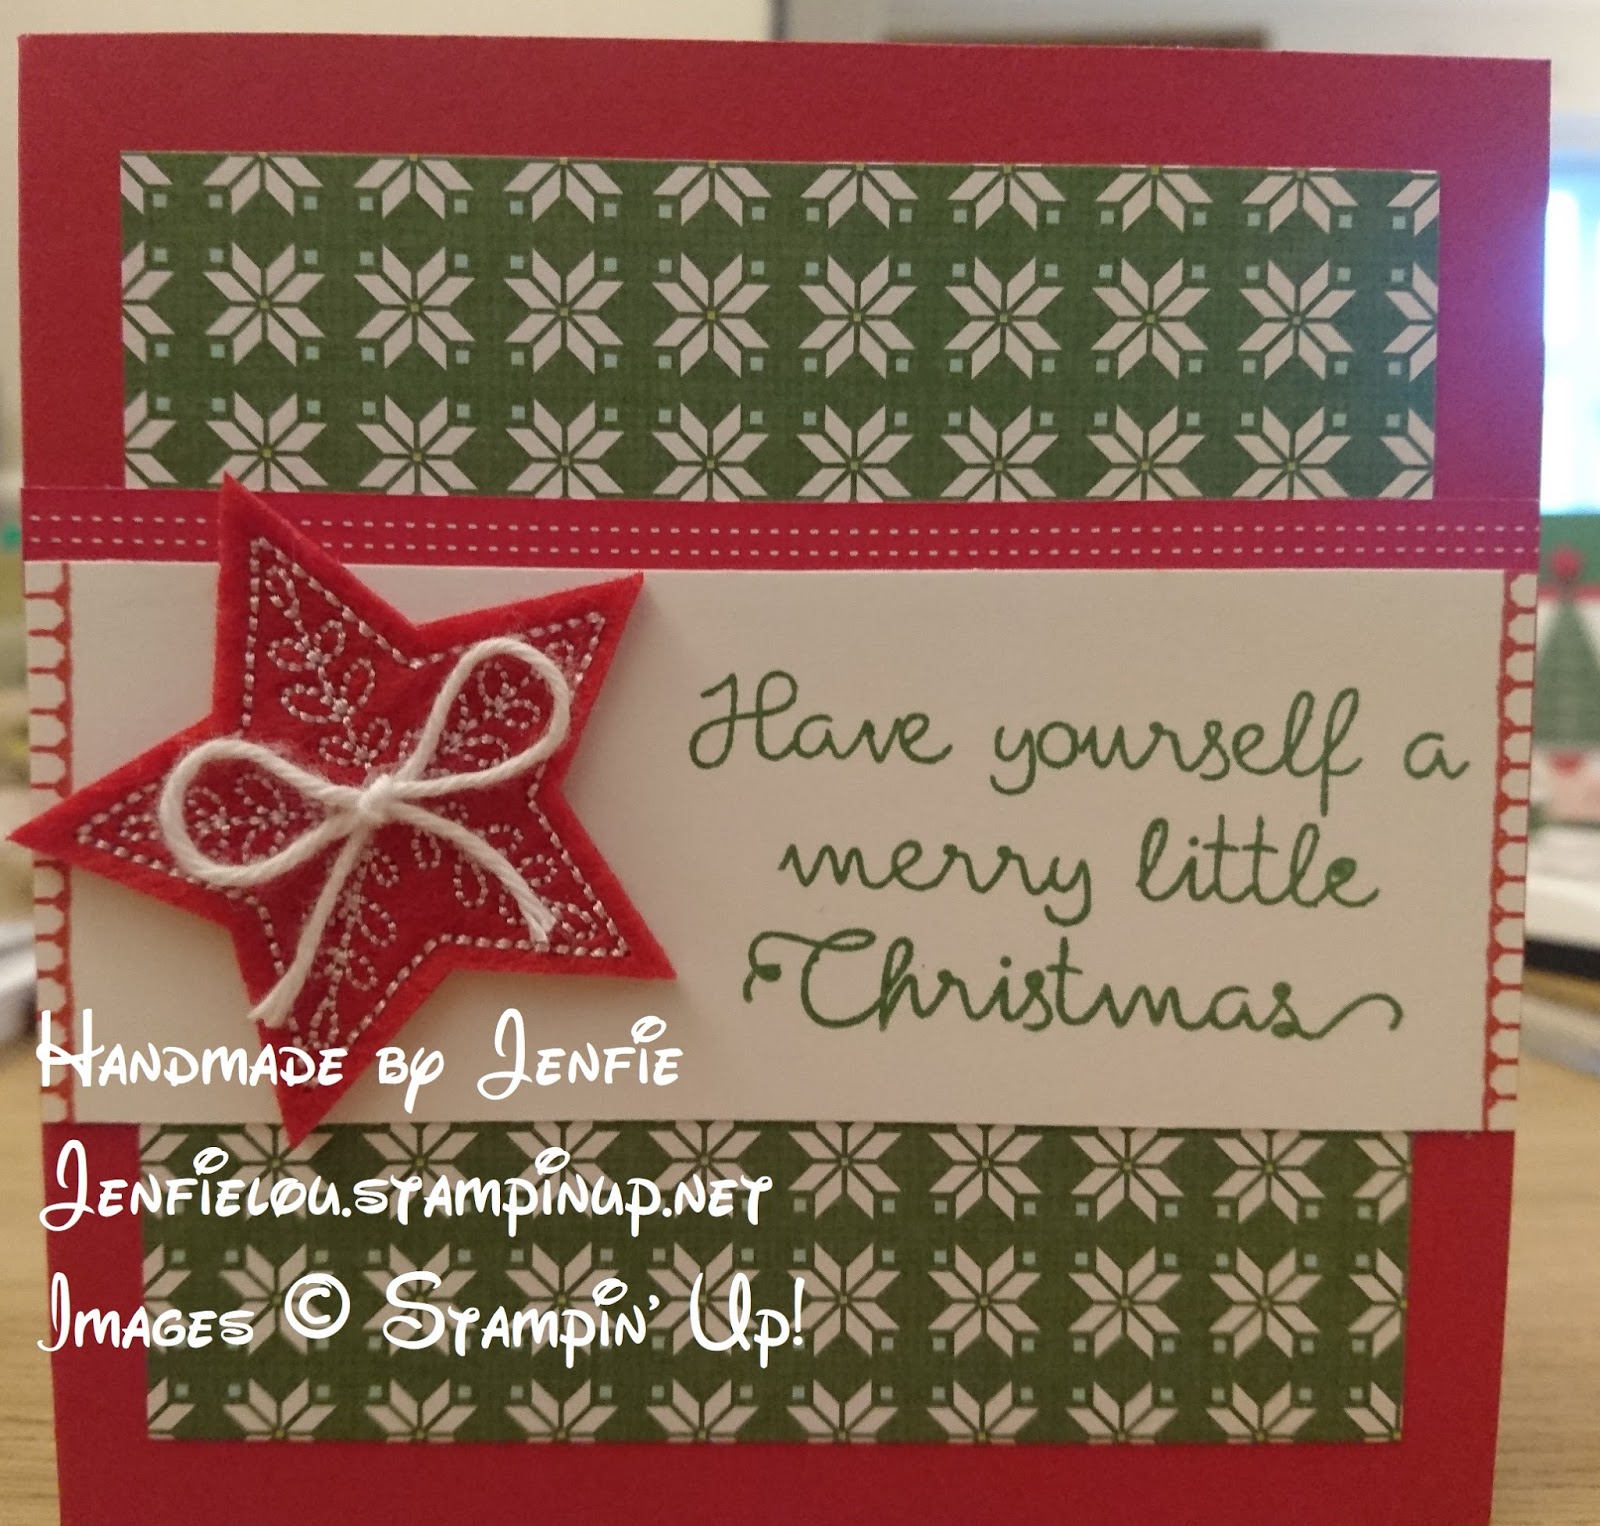
Cutting a 10cm square card blank (20cm x 10cm folded in half along the long side, just to clarify!) in Real Red A4 Cardstock. A 9cm square of Quilted Christmas 6"x6" Designer Series Paper was adhered to the card front. Another small strip of stitched DSP was adhered to a piece of Whisper White Card. The sentiment "Have yourself a merry little Christmas" and the button hole stitch stamps were used in Garden Green and Real Red leaving a space for the star Stitched Felt Embellishments. All adhered using Tombow Multipurpose Liquid Glue. A small bow in Whisper White Solid Baker's Twine was added to the middle of the star just to finish it off using a Glue Dot.

For the final card of the day, we swapped sets and used the Cookie Cutter Christmas Photopolymer Stamp Set and Cookie Cutter Builder Punch. I actually cased this card from fellow demonstrator Barb Conway, her gorgeous and elegant card is shown below:

Below is my cased version (in my opinion no where near as elegant but still cute!)

I stamped the reindeer in Early Espresso, and using Blender Pens coloured in using Early Espresso for the antlers and Crumb Cake for the faces. I added a Real Red nose for one to be Rudolph! I added three ribbons - Silver 3/8" Metallic-Edge Ribbon, Cherry Cobbler 1/4" Double-Stitched Ribbon, Quilted Christmas 1/4" (6.4 mm) Ribbon - to the card blank using Fast Fuse Adhesive. A length of Old Olive Baker's Twine was attached using Glue Dots. The reindeer were attached using Stampin' Dimensionals. The sentiment "Wishing you a season as sweet and joyful as the friendship we share." was stamped straight onto the card blank in Cherry Cobbler.
Happy Stamping
Jenfie
x
No comments:
Post a Comment